Step-by-Step Guide: How to Install JDK and Set Up Java Development Kit
Welcome to the Page Dedicated to Installing JDK!
Here, you'll find a step-by-step guide for downloading, installing, and setting up the Java Development Kit (JDK) on your computer.
Java installation consists of five steps:
- Downloading the JDK package
- Installing JDK
- Adding the JAVA_HOME variable
- Updating the Path variable
- Verifying the correctness of the Java installation
1. Downloading the JDK Package
Start by downloading the JDK package. You can download it from the Oracle website. Oracle is the company that owns Java's rights. You can download any version on this page. At the time of writing this guide, the current version is Java 22, which we will download and install.
Choose your operating system—Linux, macOS, or Windows—and then select the file type for download:

2. Installing JDK
After downloading the file, simply click on the downloaded .exe file and the following window will appear:

From here, just click "Next" on almost all steps.
In the next step, you can choose a different directory for installation. By default, it’s set to C:\Program Files\Java:

I’ll leave it as it is, click "Next," and the installation process will begin. You’ll see a status window showing the copying of new files, and finally, it’s almost done:

Click "Close" to finish the installation. But there’s still more to do.
3. Adding the JAVA_HOME Variable
Next, we need to set up the JAVA_HOME system variable. One way to do this is to search for "Edit the system environment variables":
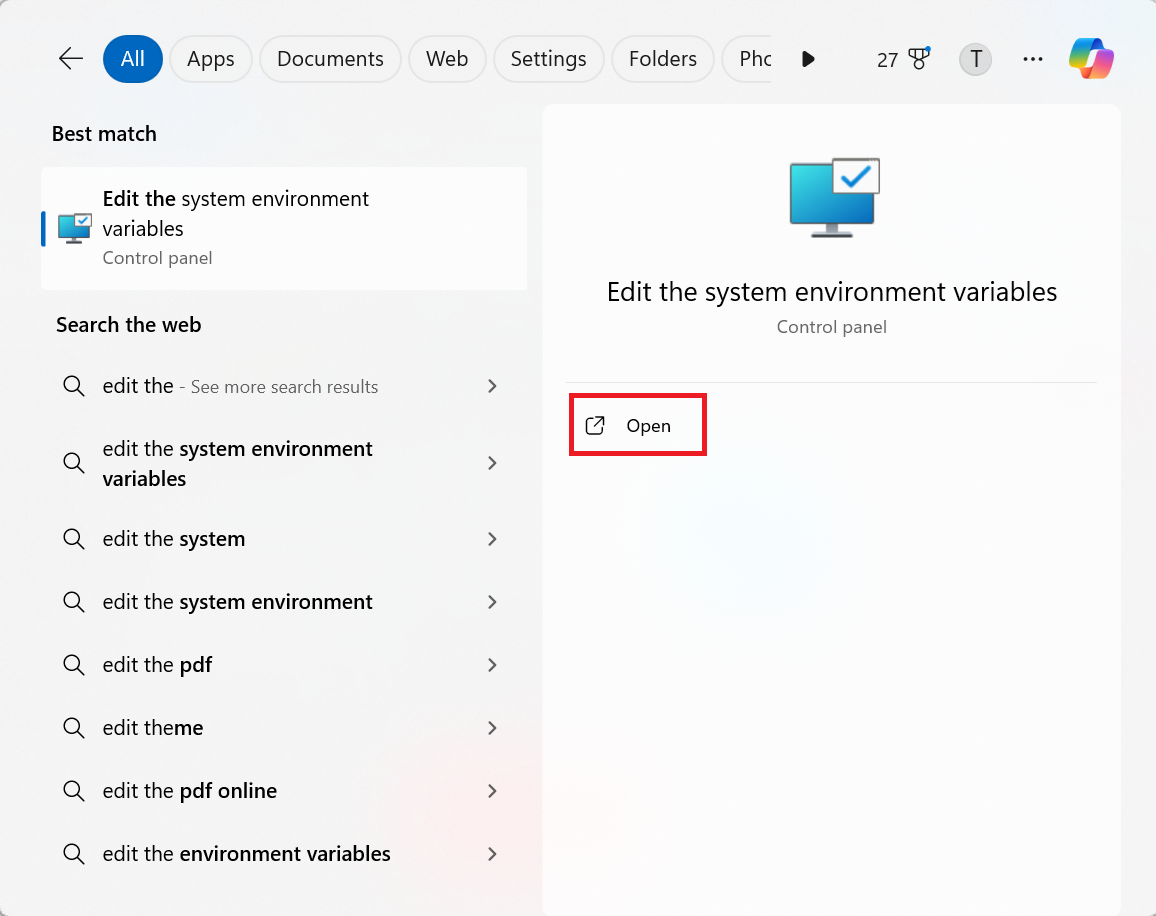
Go to the Environment Variables section:

In the system variables section, click "New" to create a new variable:
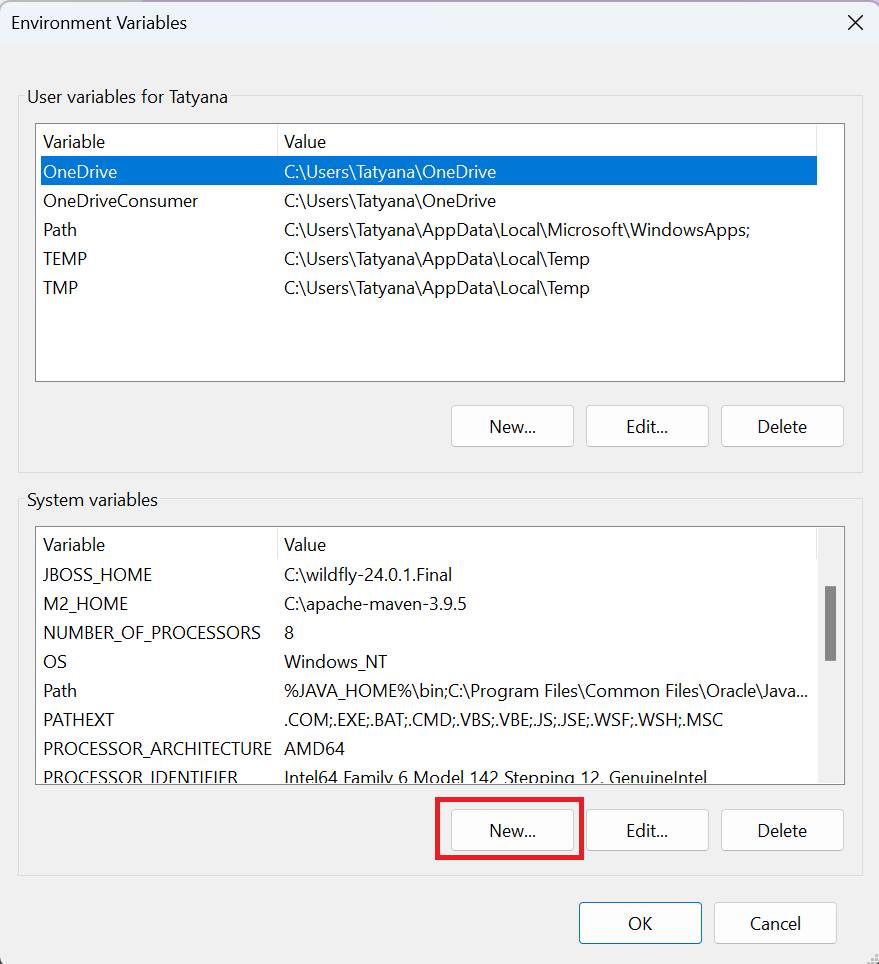
Enter the variable name JAVA_HOME in uppercase with underscores, and in the value field, specify the path to your Java directory, e.g., C:\Program Files\Java\jdk-22:

Click "OK."
4. Updating the Path Variable
Another necessary step is to update the Path variable. In the list of environment variables, find Path and click "Edit":
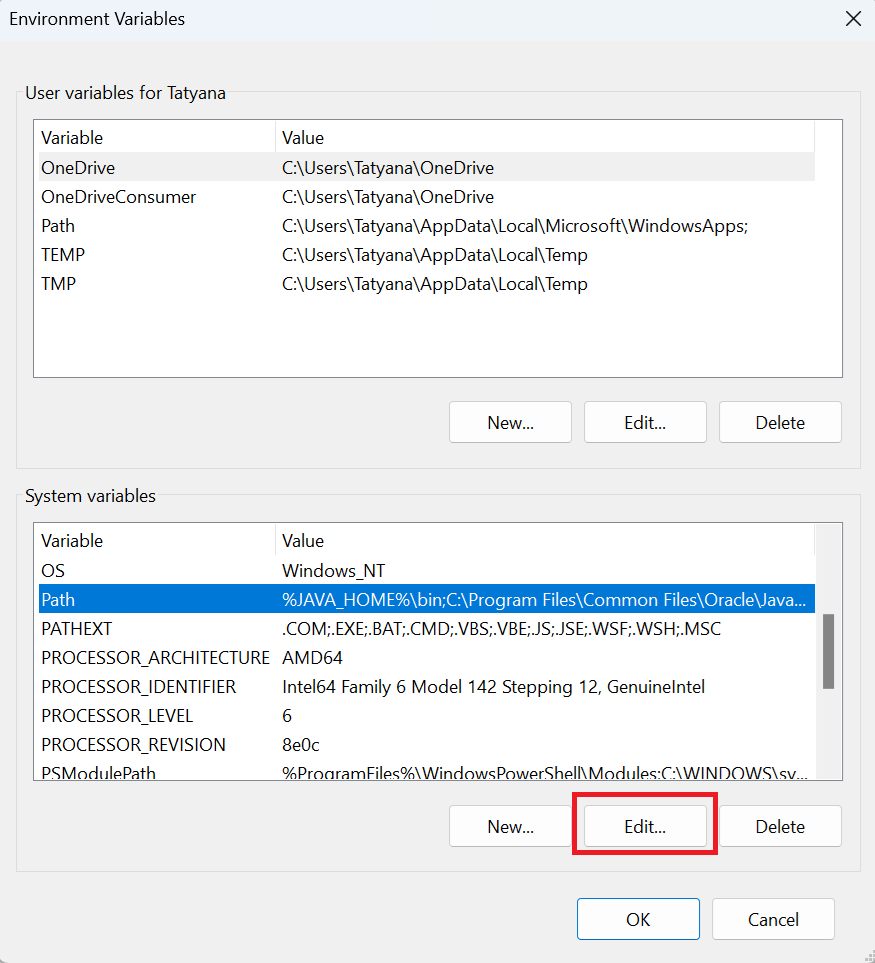
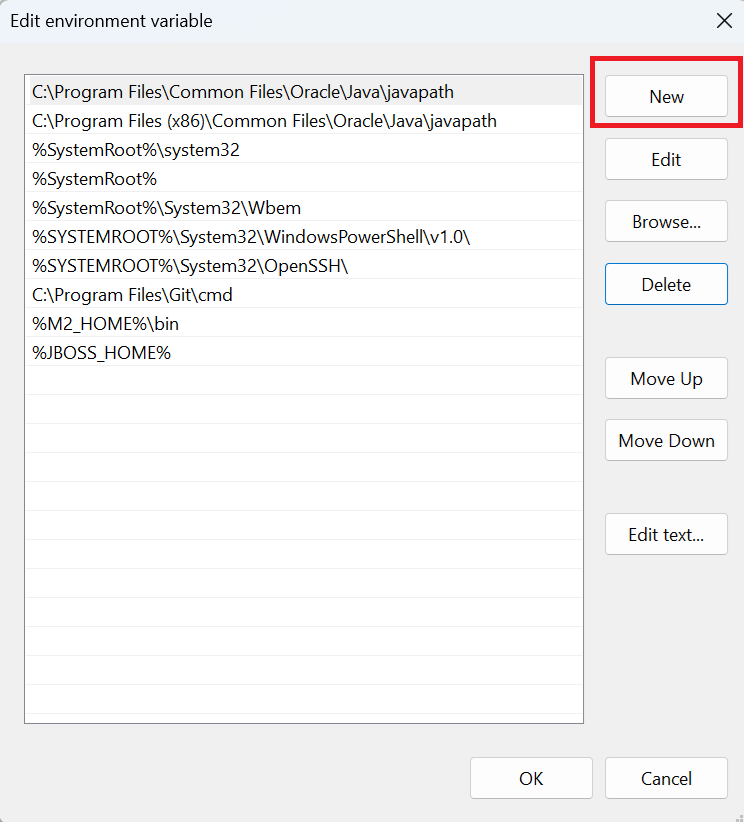
Carefully, without removing anything, click "New":
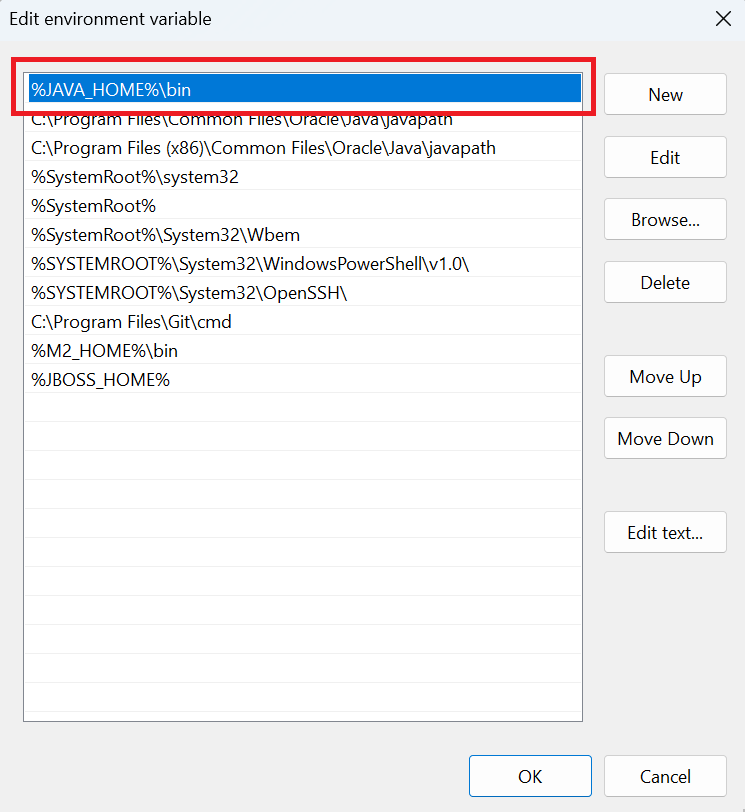
Add the line %JAVA_HOME%\bin and click "OK". It’s recommended to move the newly added line to the top:
5. Verifying the Correctness of the Java Installation
Finally, let’s check if Java is installed correctly. Open the Command Prompt by typing cmd in the search bar.
In the Command Prompt, type the following command:
If everything is fine, you will see the installed version of Java displayed:

Now, the Java installation is complete, and you can start writing Java programs.
Please log in or register to have a possibility to add comment.