Step-by-Step Guide: How to Install and Set Up JDK in 2026
This guide walks you through installing the JDK (Java Development Kit) on your computer: downloading, installing, and configuring environment variables. The steps are shown on Windows; brief sections for macOS and Linux are below.
Which version to install
Install the latest Long-Term Support (LTS) release — as of 2026 that's Java 25. The screenshots below show an earlier version, but the steps are the same; just pick the current one. Learn more about LTS in the History of Java lesson.
You can also choose between Oracle JDK and OpenJDK. OpenJDK (for example, Eclipse Temurin builds) is free for any use and functionally identical. Oracle JDK is also free for development but has licensing nuances for some commercial scenarios. Either works for learning; the steps below use Oracle JDK.
The installation has five steps:
1. Downloading the JDK Package
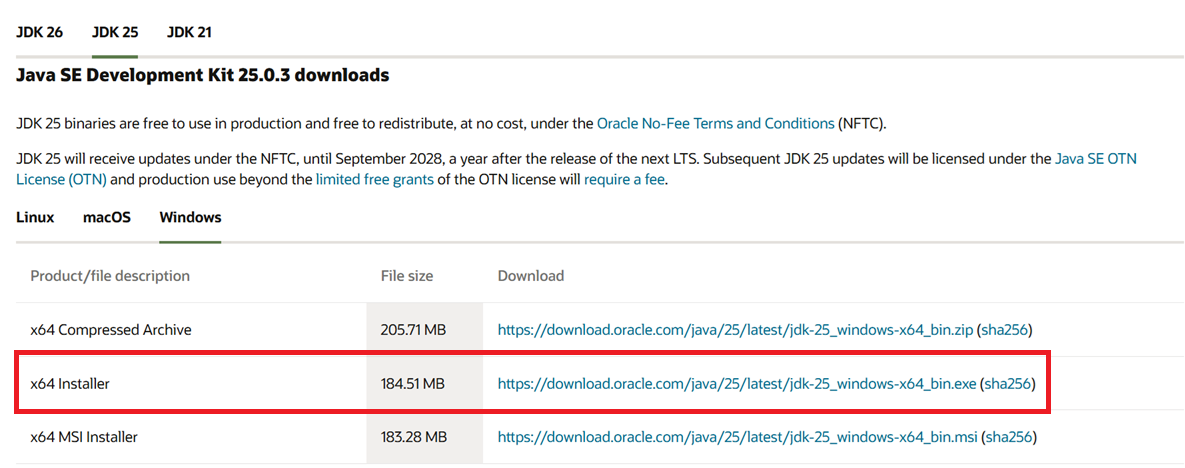
Start by downloading the JDK package. You can download it from the Oracle website. Oracle is the company that owns Java's rights. You can download any version on this page. At the time of writing this guide, the current version is Java 26, but LTS is Java 25. So it is recommended to install Java 25 (on the screens it is older version, but all steps are the same).
Choose your operating system—Linux, macOS, or Windows—and then select the file type for download:
2. Installing JDK
After downloading the file, simply click on the downloaded .exe file and the following window will appear:
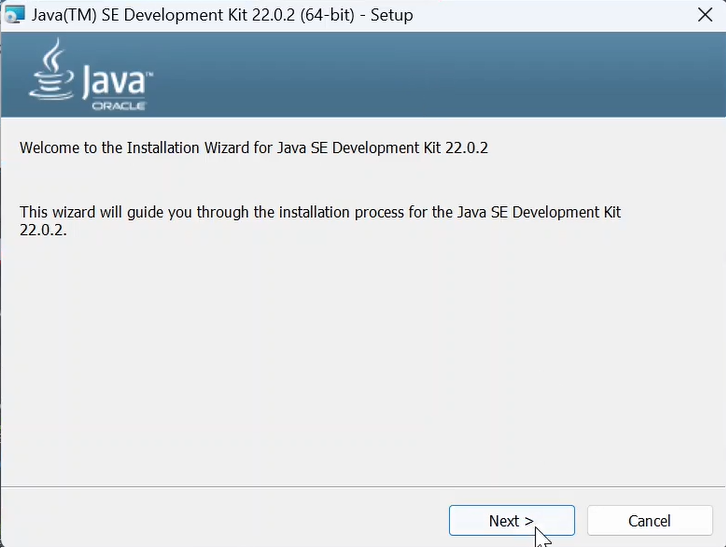
From here, just click "Next" on almost all steps.
In the next step, you can choose a different directory for installation. By default, it’s set to C:\Program Files\Java:
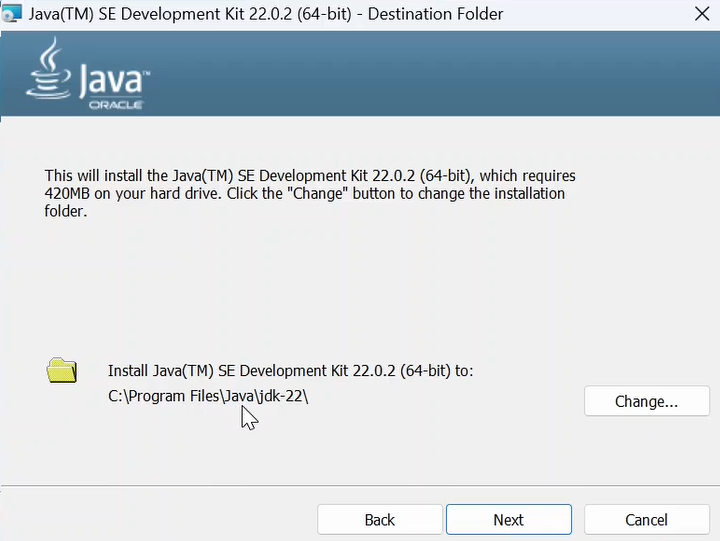
I’ll leave it as it is, click "Next," and the installation process will begin. You’ll see a status window showing the copying of new files, and finally, it’s almost done:
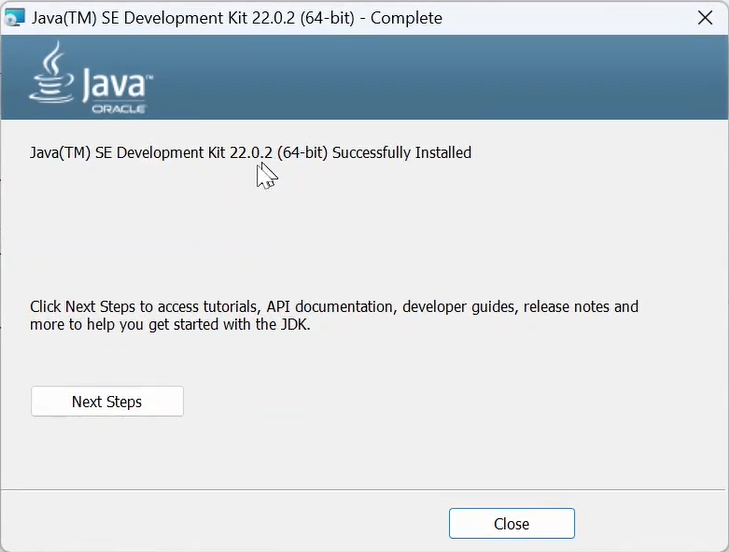
Click "Close" to finish the installation. But there’s still more to do.
3. Adding the JAVA_HOME Variable
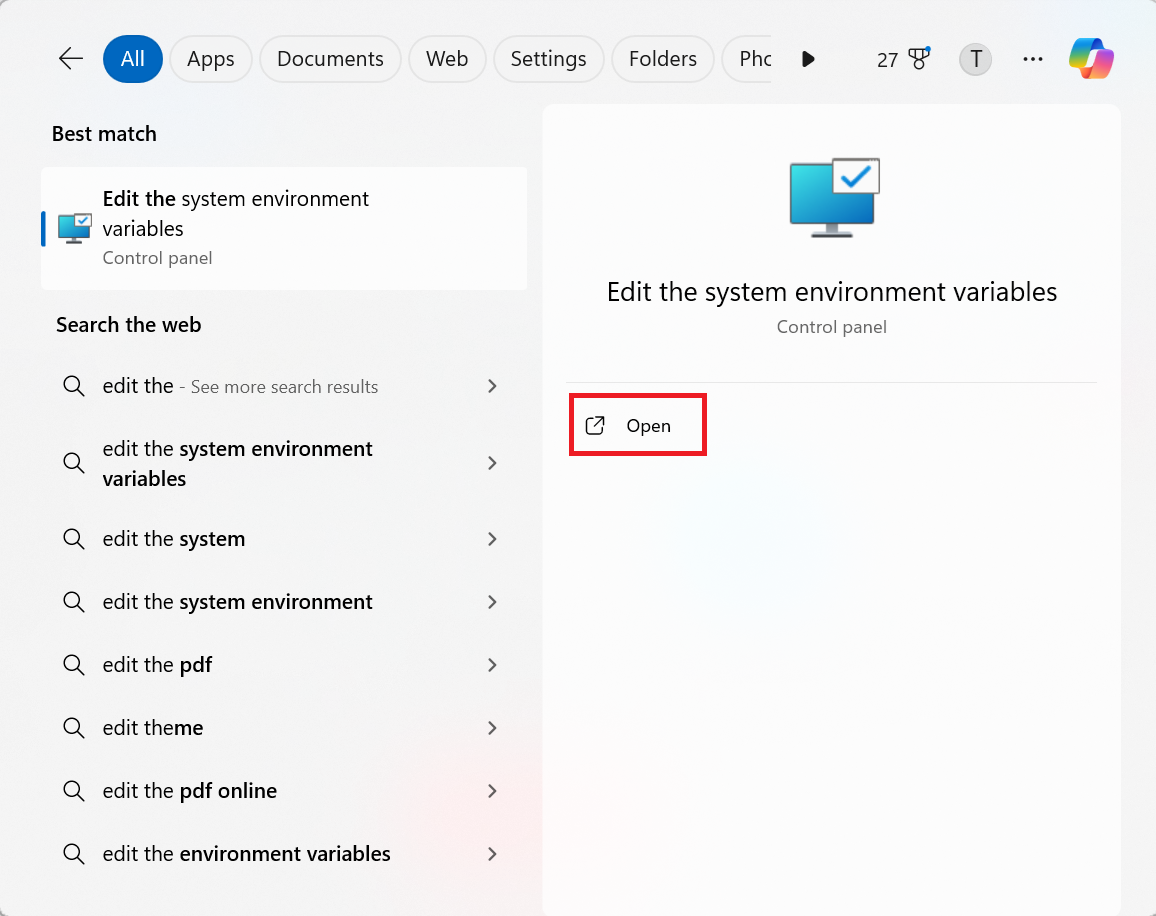
Next, we need to set up the JAVA_HOME system variable. One way to do this is to search for "Edit the system environment variables":
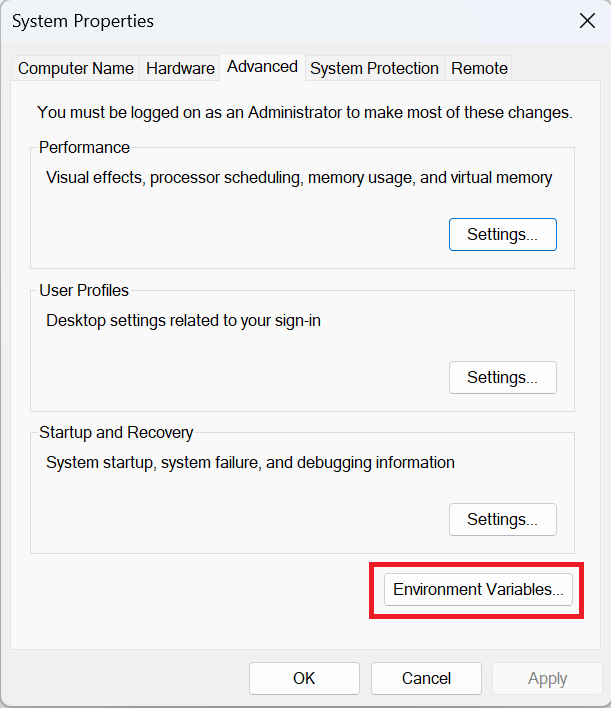
Go to the Environment Variables section:
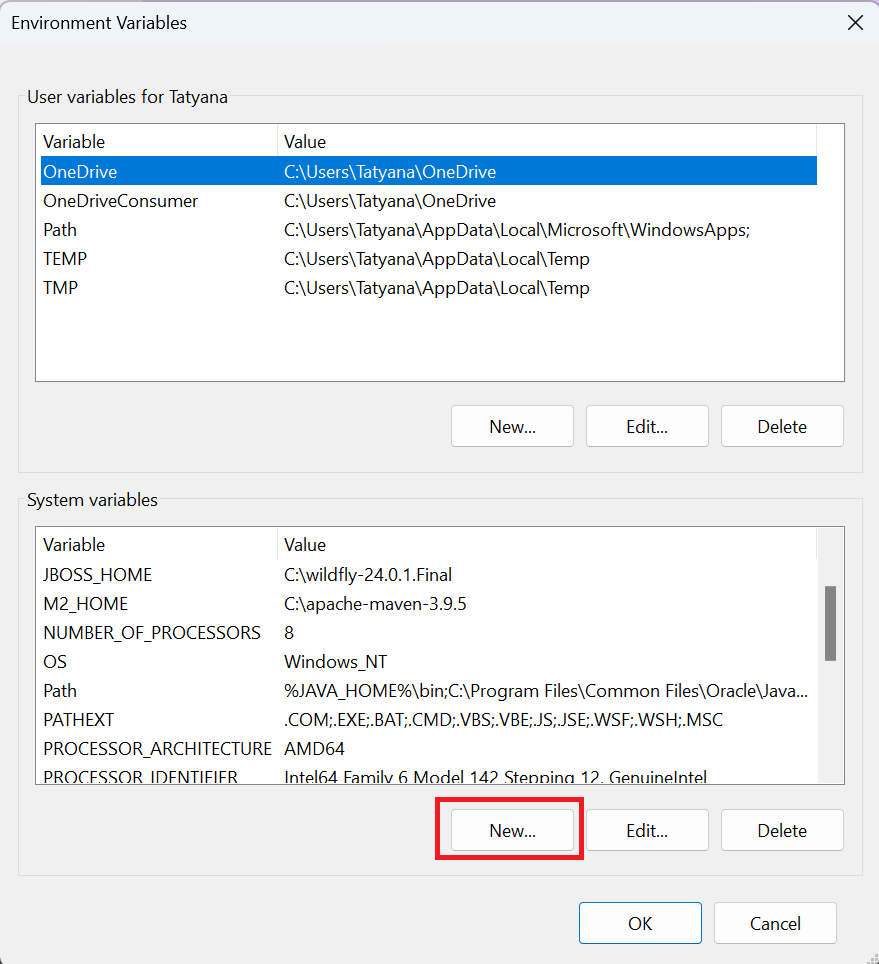
In the system variables section, click "New" to create a new variable:
Enter the variable name JAVA_HOME in uppercase with underscores, and in the value field, specify the path to your Java directory, e.g., C:\Program Files\Java\jdk-25:
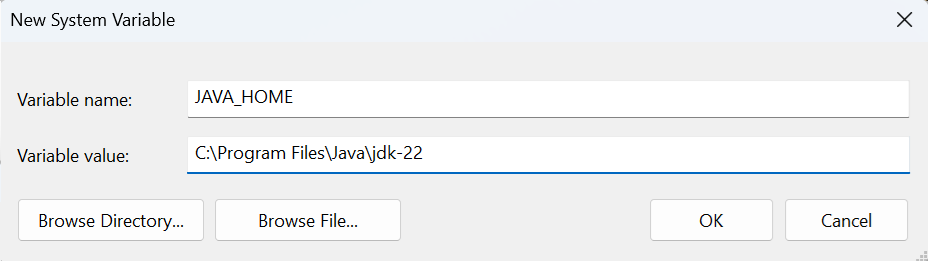
Click "OK."
4. Updating the Path Variable
Another necessary step is to update the Path variable. In the list of environment variables, find Path and click "Edit":
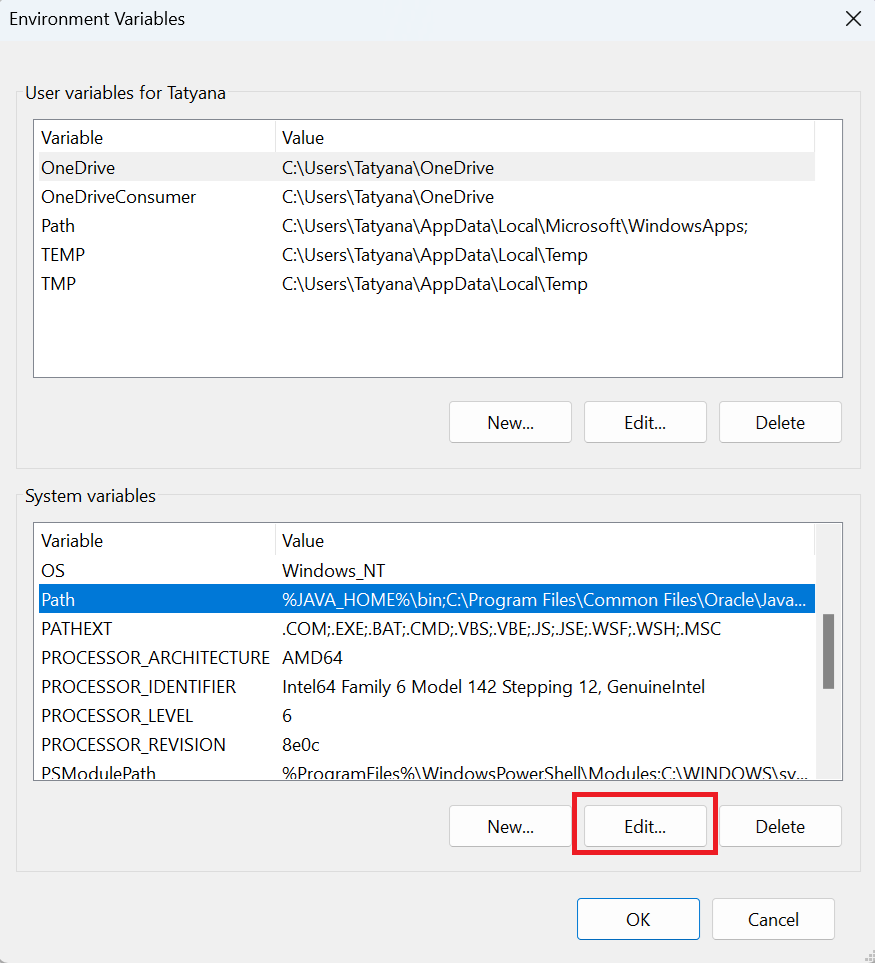
Carefully, without removing anything, click "New":
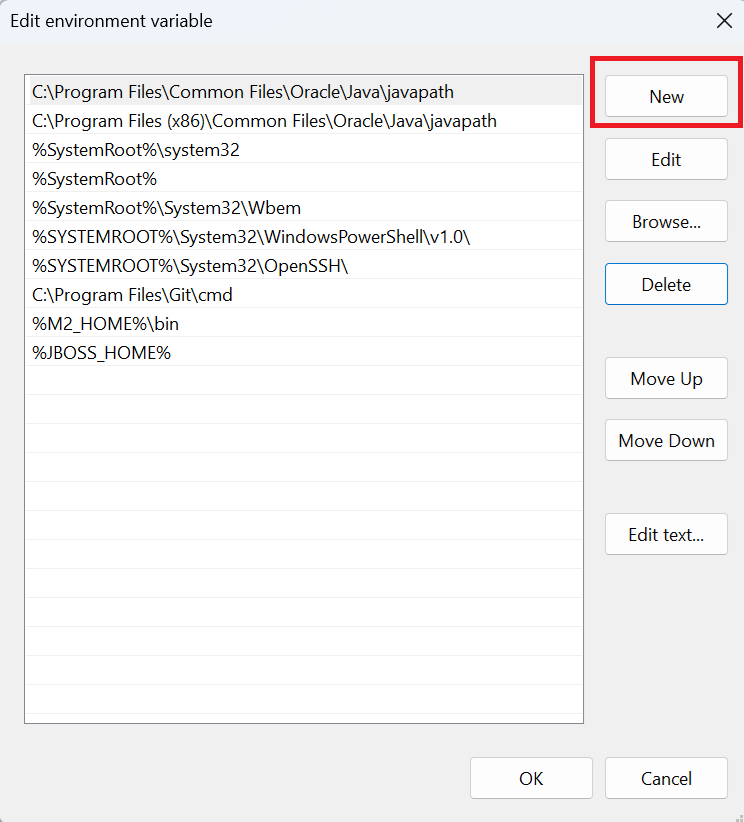
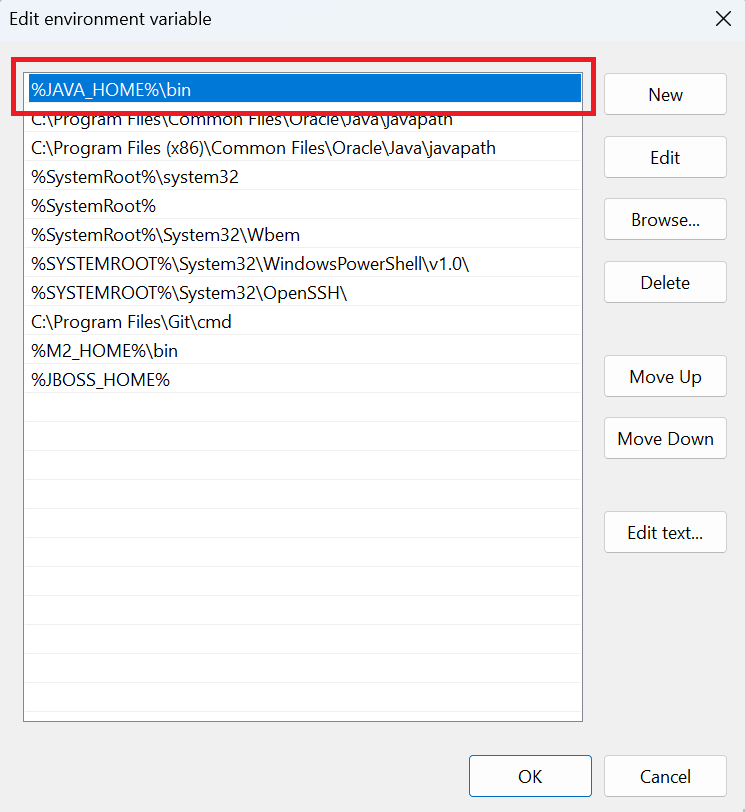
Add the line %JAVA_HOME%\bin and click "OK". It’s recommended to move the newly added line to the top:
5. Verifying the Correctness of the Java Installation
Finally, let’s check if Java is installed correctly. Open the Command Prompt by typing cmd in the search bar.
In the Command Prompt, type the following command:
java -versionIf everything is fine, you will see the installed version of Java displayed:

Now, the Java installation is complete, and you can start writing Java programs.
6. Installing on macOS and Linux
macOS
The easiest way is the Homebrew package manager. In the terminal, run:
brew install openjdk@25After installing, Homebrew tells you how to add the JDK to your PATH. Alternatively, download a .dmg installer from Oracle or Adoptium and install it like any app. The check is the same:
java -versionLinux (Ubuntu/Debian)
Install OpenJDK from the repository:
sudo apt update
sudo apt install openjdk-25-jdk
Verify with
java -versionIf you have several Java versions, switch between them with
sudo update-alternatives --config java7. Common installation problems
'java' is not recognized as an internal or external command. The most common error. It means the path to the JDK isn't in your Path variable (step 4), or the command prompt wasn't restarted. Close and reopen the command prompt, and check that Path contains %JAVA_HOME%\bin.
java -version shows an old version. If Java was installed before, an old path may remain in Path. Make sure %JAVA_HOME%\bin is listed above other Java paths, and that JAVA_HOME points to the right folder.
JAVA_HOME isn't recognized. Check that the variable is set under System variables (not User), the name is uppercase — JAVA_HOME — and the path points to the JDK root (e.g. C:\Program Files\Java\jdk-25), without \bin at the end.
Frequently asked questions
Which JDK version should a beginner install?
The latest LTS release (Java 25 as of 2026). LTS versions get long-term support and are what most companies rely on.
What's the difference between Oracle JDK and OpenJDK?
They're functionally identical. OpenJDK (such as Eclipse Temurin) is free for any use; Oracle JDK has licensing limits for some commercial scenarios. Either is fine for learning.
Why do I need the JAVA_HOME variable?
It tells other programs (IDEs, Maven, Gradle) where the JDK is. Many development tools expect this variable to be set.
What if java -version doesn't work after installation?
Usually the Path variable isn't set, or the command prompt wasn't restarted. Check that %JAVA_HOME%\bin is in Path and reopen the console.
Do I need to remove an old Java version before installing a new one?
Not necessarily. Multiple versions can coexist; which one is used is determined by JAVA_HOME and Path.
Video Explanation
Prefer video format? Watch this lesson with examples and explanations.
Comments