Configure IntelliJ IDEA for Cloning
In this section, you'll learn how to register on GitHub, install Git, configure IntelliJ IDEA for GitHub work, and clone a repository from GitHub. Let's start step-by-step:
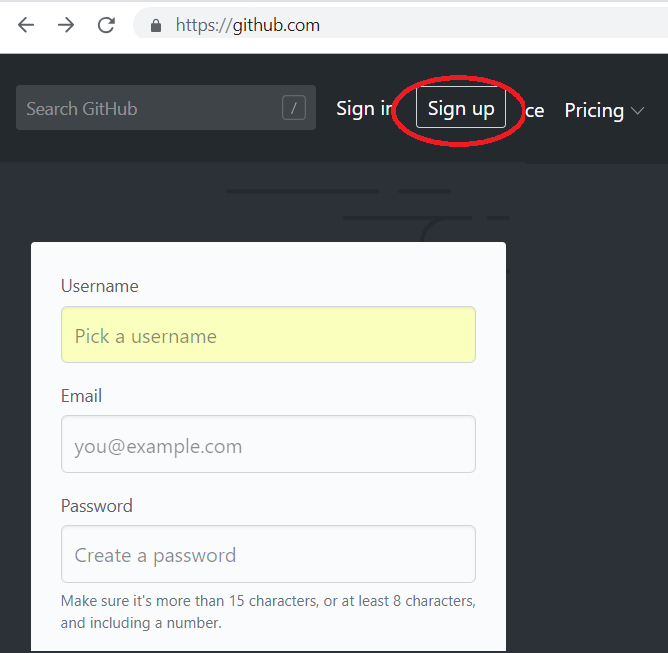
Step 1: Go to https://github.com and click Sign Up to create your account.
Step 2: Choose a username and password. Enter your email — you'll receive a confirmation email. Click the link to activate your account. 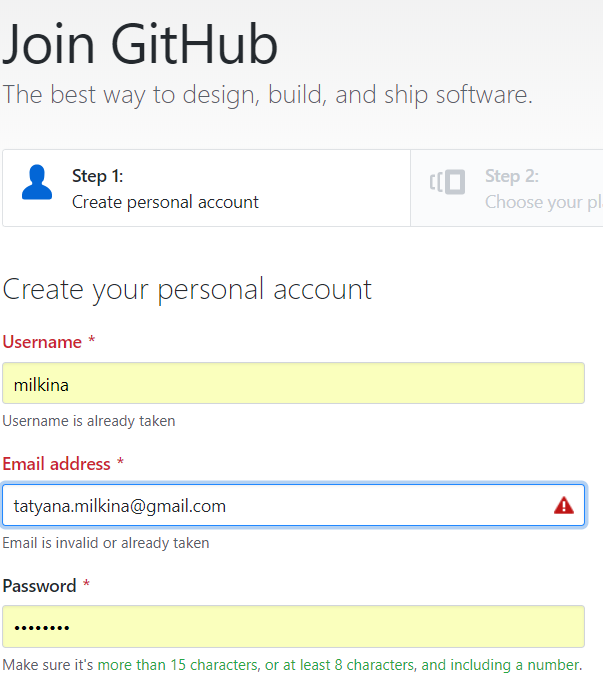
Step 3: Download Git from https://gitforwindows.org/. Click Download, run the .exe installer, and follow the default settings. 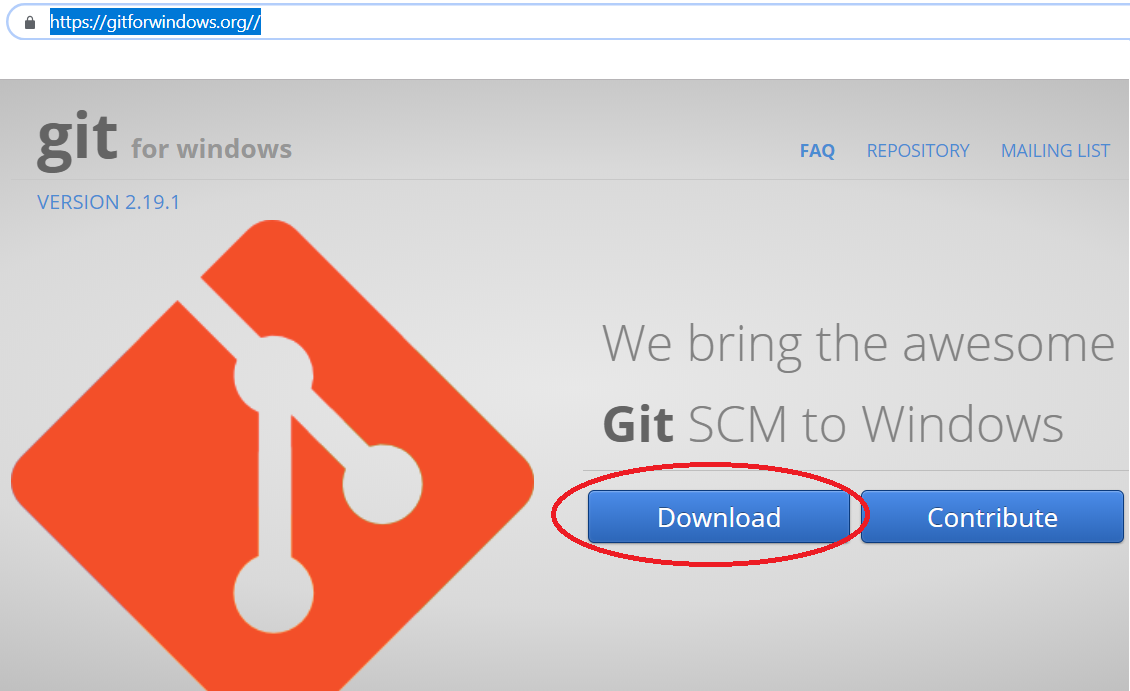
Step 4: Open IntelliJ IDEA and go to Settings (Ctrl+Alt+S). In the search field write "git", then select the GitHub and Git sections: 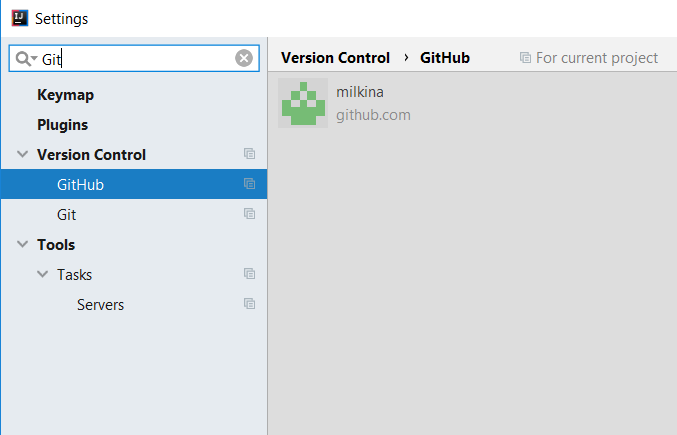
Step 5: In the GitHub settings, ensure the "Clone repositories using SSH" checkbox is unchecked. Click the "+" button: 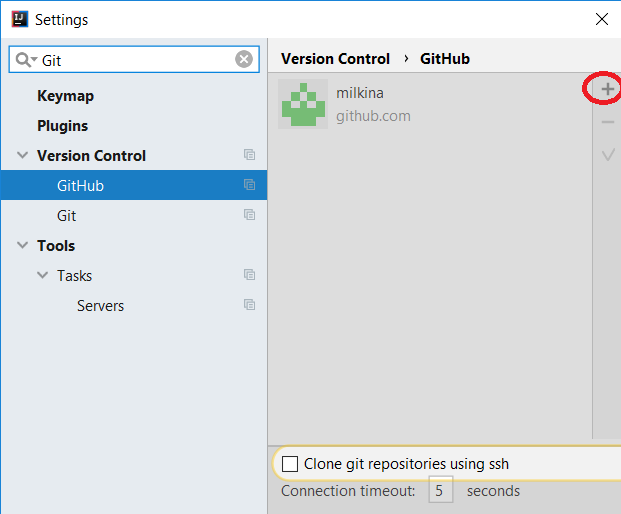
In the popup, enter the GitHub username and password you registered with in Step 2. Verify the Server field is set to “github.com” and click Log in: 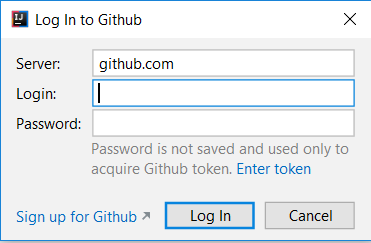
Step 6: Go to the Git settings. In the “Path to Git executable” field, ensure the path points to your Git installation (from Step 3). IntelliJ IDEA usually auto-detects the executable; otherwise, click “...” to locate it manually. You can click Test to confirm the path is correct. 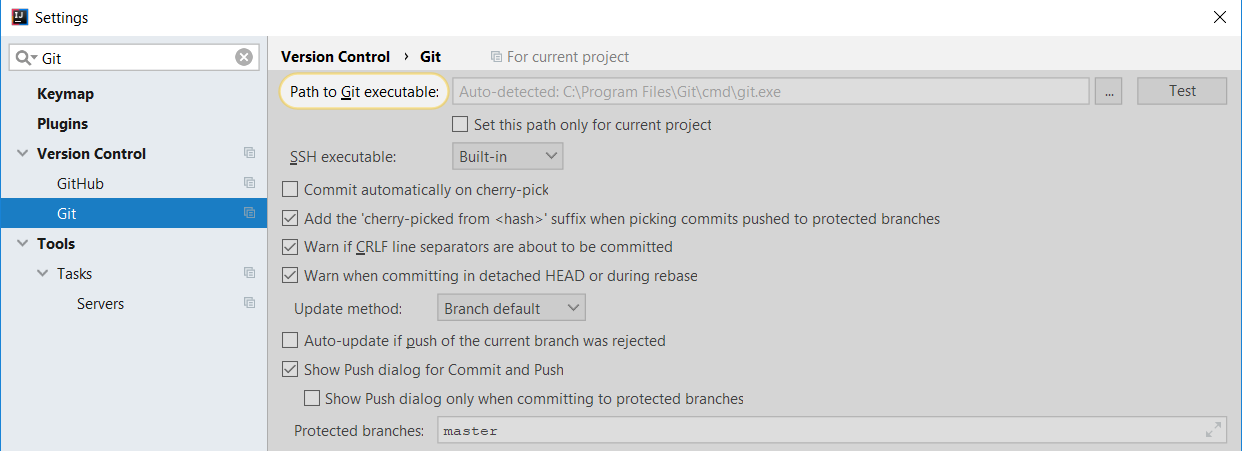
Step 7: In IntelliJ IDEA, go to File → New → Project from Version Control → Git: 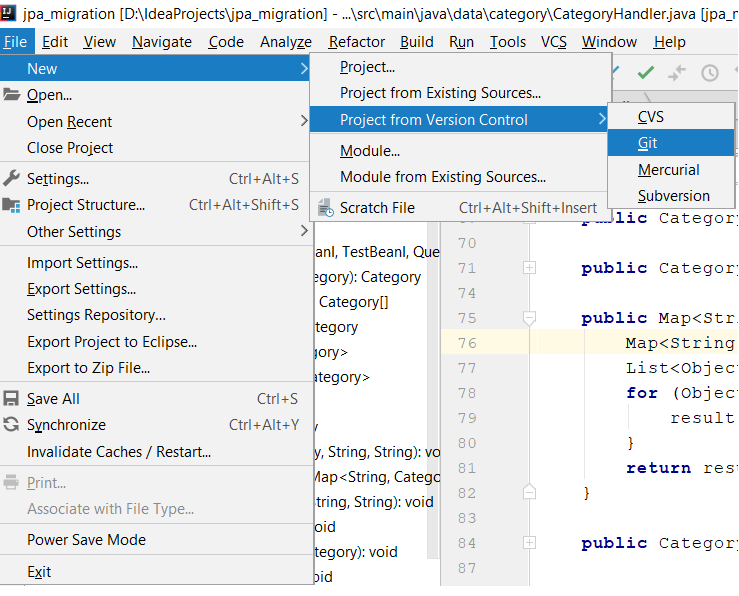
Step 8: In the popup, paste the repository URL, e.g. https://github.com/milkina/java-core.git, and choose the target directory. Click Clone. IntelliJ IDEA will download the repo and open it as a new project. 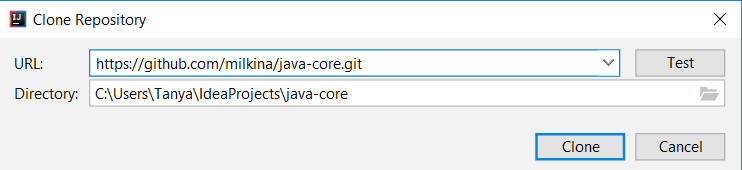
Step 9: You need to configure the project. In the Project window, select the root folder, press F4 or right-click and choose Open Module Settings: 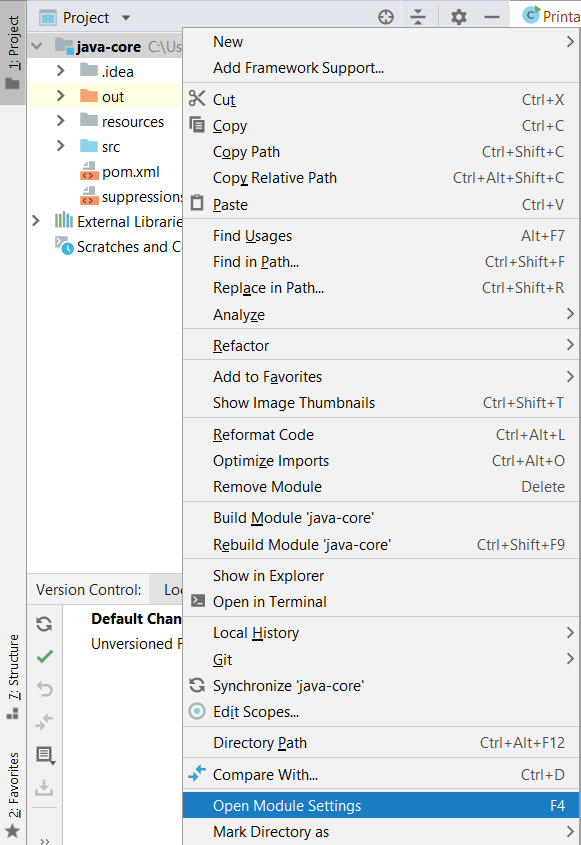
Step 10: In Module Settings, go to the Project section. If no SDK is configured, click New and select your installed JDK. Also choose the matching Project language level: 
Step 11: In Module Settings → Modules tab → Sources: mark the src folder as “Sources” and resources as “Resources”: 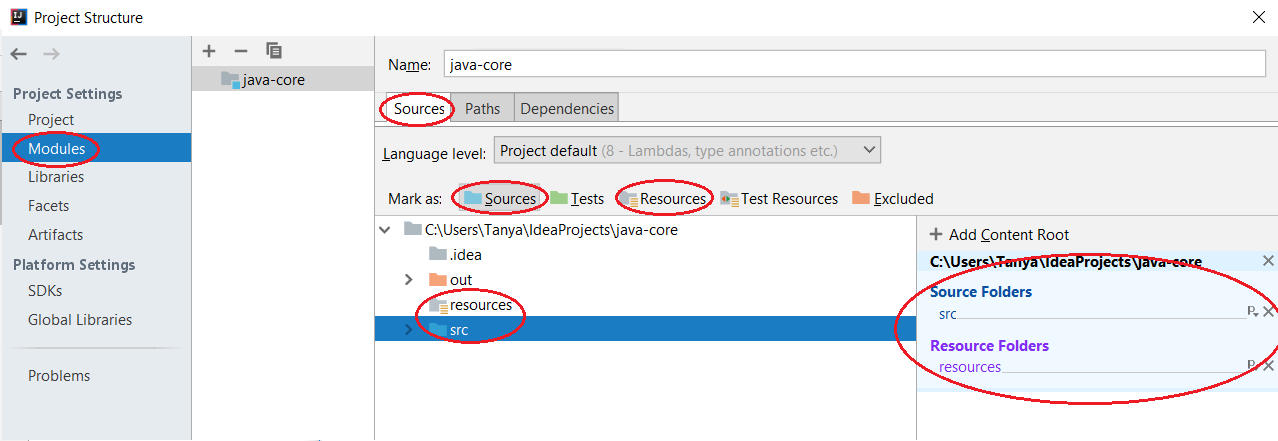
Step 12: In Module Settings → Paths tab: select “Use module compile output path” and set the Output path to the project’s out folder: 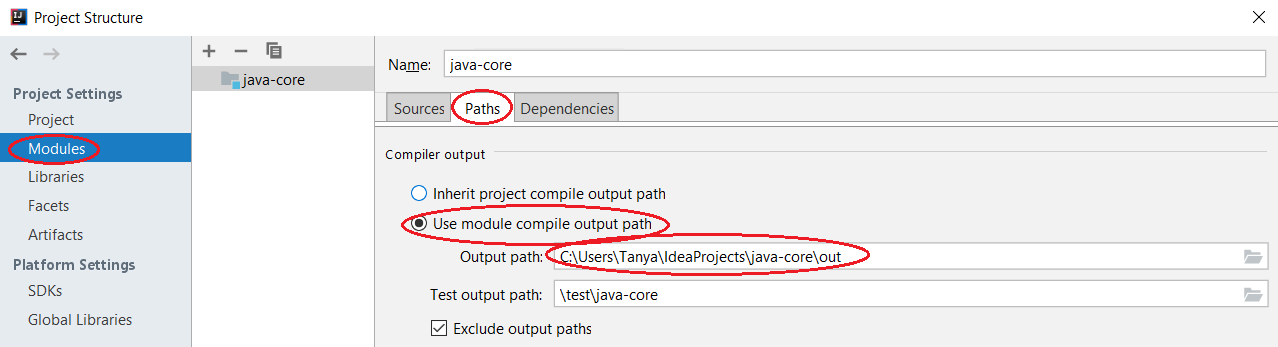
Conclusion
You’ve now learned how to sign up on GitHub, install Git, configure IntelliJ IDEA, and clone a repository. These steps will help you connect to collaborative development, work with remote repos, and manage code using Git version control.